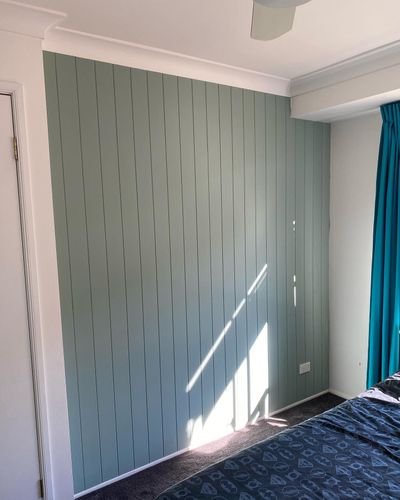
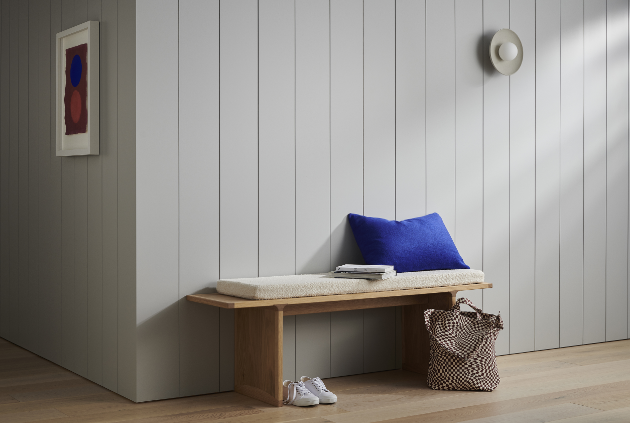
Want to know how to install VJ paneling? It’s easier than you might think! With just a few tools and some basic DIY skills, you can completely transform a plain wall into a stylish feature that adds warmth and character to any room. VJ paneling installation is a simple way to upgrade your home without spending a fortune or calling in the pros.
Whether you’re going for a full wall, half wall paneling, or need to tackle trickier surfaces like plaster or brick, this guide has you covered, including helpful tips for villaboard installation too. Let’s dive in and get started!
What is VJ Paneling?
VJ paneling, also known as vertical joint paneling, is a type of decorative wall panel made of MDF, plywood, or fiber cement. Each panel has vertical grooves or “joints” that give a classic tongue-and-groove timber wall look. It’s a popular design choice in both modern and country-style homes.
You can install a VJ board to cover a full wall or create a half wall with a feature rail on top. Some people even use it for ceilings or kitchen islands.
Tools and Materials You’ll Need
Before you begin your VJ paneling installation, make sure you have the right tools and materials. Here’s a quick checklist:
Tools:
- Tape measure
- Spirit level
- Stud finder
- Nail gun or drill
- Handsaw or circular saw
- Gap filler or wood putty
- Sandpaper
- Paintbrush or roller (if painting)
Materials:
- VJ boards or villaboards
- Liquid nails or strong adhesive
- Nails or screws
- Primer and paint (optional)
- Timber trim (for top rail, if installing half wall paneling)
How to Install VJ Paneling – Step-by-Step DIY Guide

Step 1: Measure Your Wall
First, measure the width and height of the wall you want to cover. This will help you figure out how many VJ boards you need. Most panels come in standard sizes, so check the product details.
Tip: Buy one or two extra boards in case of cutting errors.
Step 2: Mark Stud Locations
Use a stud finder to locate the wall studs behind your plaster or drywall. Mark each stud with a pencil. You’ll need to attach the VJ panels to these studs for the best support.
Step 3: Prepare the Surface
Whether you’re learning how to install VJ paneling over plaster or how to install VJ paneling over brick, make sure the surface is clean, dry, and smooth.
- Over Plaster: Lightly sand the surface and wipe off dust. This helps the glue stick better.
- Over Brick: Use a levelling batten or timber frame to create a flat surface. You can attach this frame directly to the brick wall, then attach the panels to the frame.
This is key when learning how to install wall cladding or dealing with uneven surfaces.
Step 4: Cut the VJ Panels to Size
Measure the height of your wall (or half wall, if doing half wall paneling) and cut your VJ panels to fit. Use a handsaw for small jobs or a circular saw for cleaner cuts.
Remember to wear safety goggles and a dust mask while cutting.
Step 5: Apply Adhesive
Put liquid nails or a panel adhesive on the back of each board in a zig-zag pattern. This will help the panel stick securely to the wall.
Be generous with the glue, especially if you’re not using many nails.
Step 6: Position the Panels
Place the first panel in the corner of the wall, making sure it’s level using a spirit level. Press it firmly onto the wall.
Use a nail gun or screws to secure the board to the wall studs. If using nails, place them near the grooves to hide them easily later.
Repeat this step with the rest of the boards, checking the level as you go.
Step 7: Fill Gaps and Nail Holes
Once all boards are in place, fill any visible nail holes and gaps between the boards using gap filler or wood putty. Smooth it out with your finger or a putty knife. Let the filler dry completely, then lightly sand the surface.
Step 8: Paint and Finish
If you’re painting the panels, apply a coat of primer first. Then, paint the boards with your chosen color. Use a paintbrush for grooves and a roller for flat surfaces. If you’re doing half wall VJ paneling, you can add a top timber trim or chair rail for a finished look.
Tips for a Perfect Finish
Start from one corner and move across the wall, checking that each panel is level. If you’re working on ceilings or tight spots, paint the boards before installing. For a clean look, apply caulk in the corners and fill any small gaps.
Common Mistakes to Avoid
- Not checking for wall studs (leads to weak panels)
- Using too little glue or skipping nails
- Forgetting to leave expansion gaps for wood panels
- Rushing the paint job without priming first
Final Thoughts
VJ paneling installation is a fun and rewarding DIY project that can dramatically transform the look of any room. With the right tools, preparation, and care, you can get a professional-looking finish without needing to hire a tradie.
Whether you’re working with plaster, brick, or going for a half-wall feature, these steps will help you achieve a clean, timeless look. Remember to always take your time, follow safety tips, and enjoy the process of refreshing your space.
FAQs
How to install VJ paneling over plaster?
Lightly sand the plaster wall, clean it, and use strong adhesive plus nails into studs for better hold. Make sure to level each panel.
How to install a VJ paneling half wall?
Measure and mark your desired height, install VJ panels up to that point, and add a top trim to complete the half wall paneling look.
How to install wall cladding?
Cladding can be installed using adhesive and nails, just like VJ paneling. Make sure the surface is even, and use battens on uneven walls.
How to install VJ paneling over brick?
Install timber battens over the brick using masonry screws, then attach VJ boards to the battens. This creates a smooth surface for the boards.

